Getting Started
Magic Note is free. Pick an AI provider, paste a key, choose a model. You'll be writing in under two minutes.
1. Pick where the AI runs
Magic Note talks to your provider — never through us. Bring a key from any of these (or skip cloud entirely and point at your own server):
For most users Claude Haiku or GPT-5 mini cost a few dollars a month. Set a hard spending cap in your provider's console so you're never surprised. Custom endpoint = zero API cost.
2. Onboarding flow
On first launch Magic Note walks you through picking an AI, entering a key, and verifying the connection.
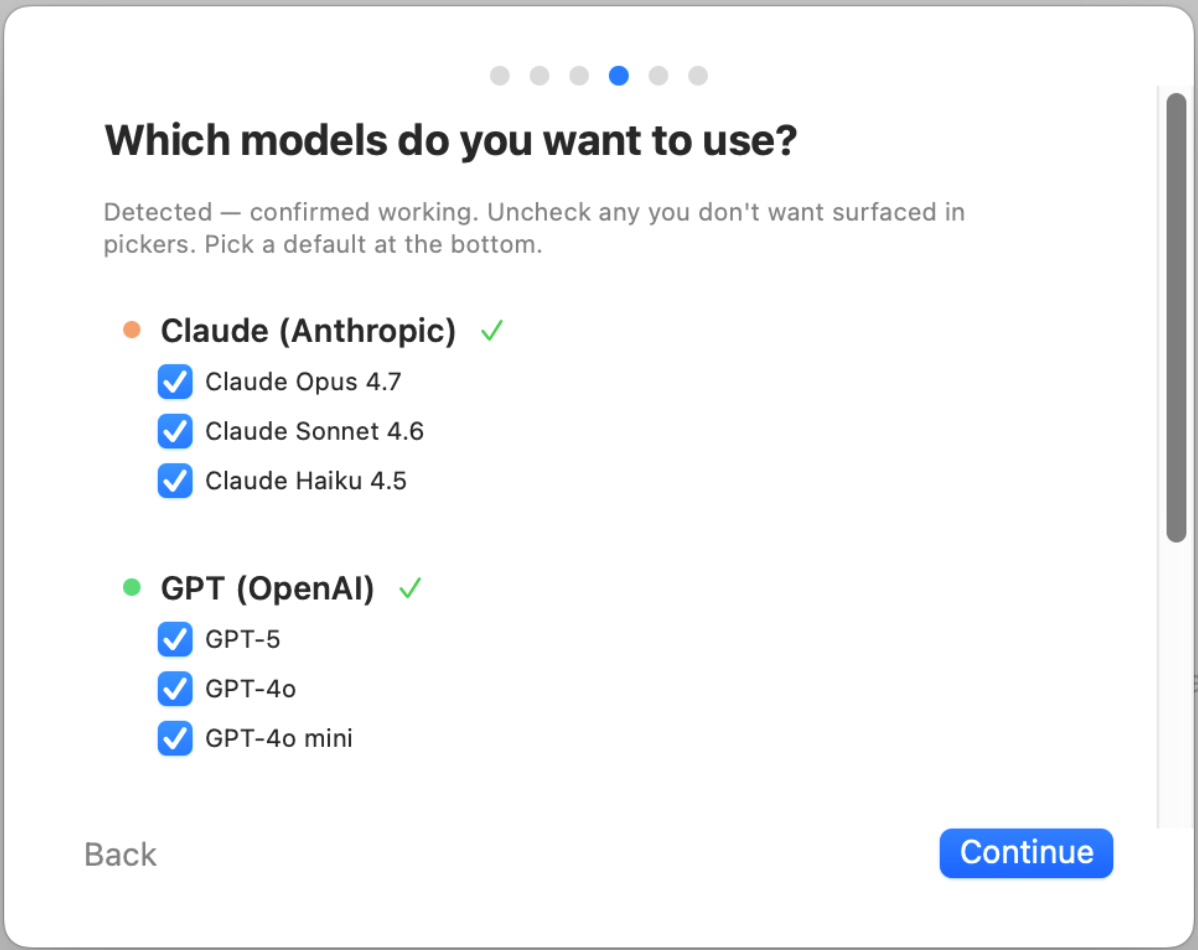
Pick your AI right inside the onboarding sheet.
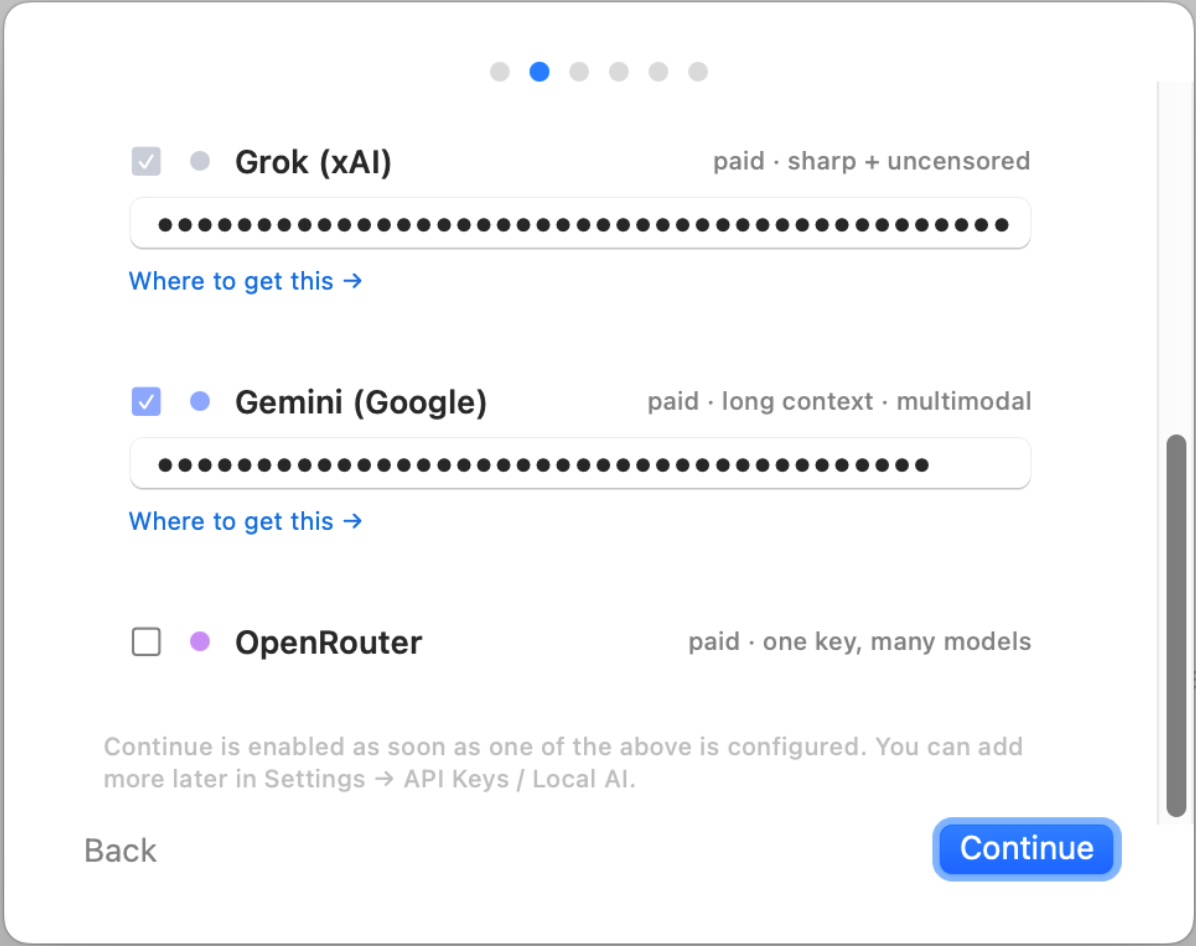
Paste a key for whichever provider you picked — or skip and add it later.
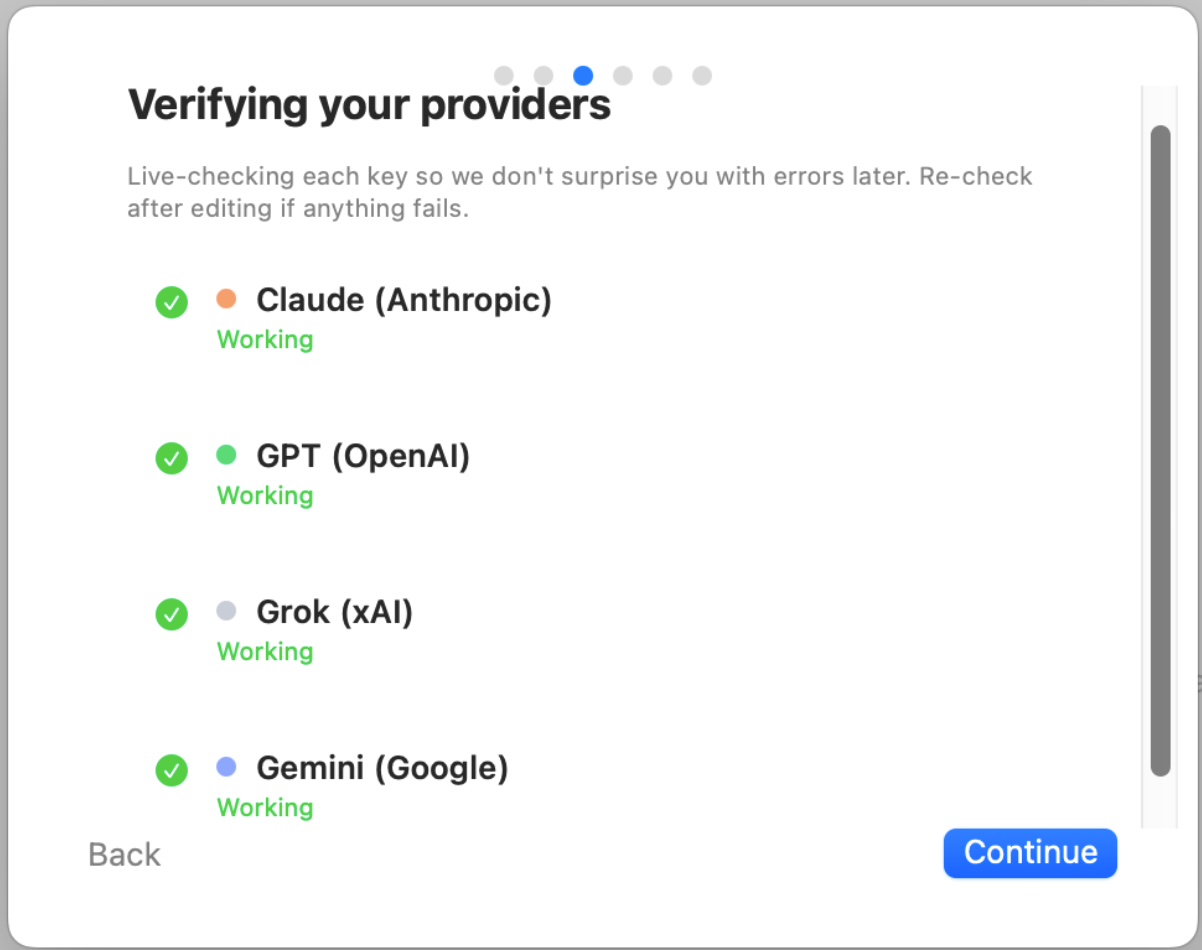
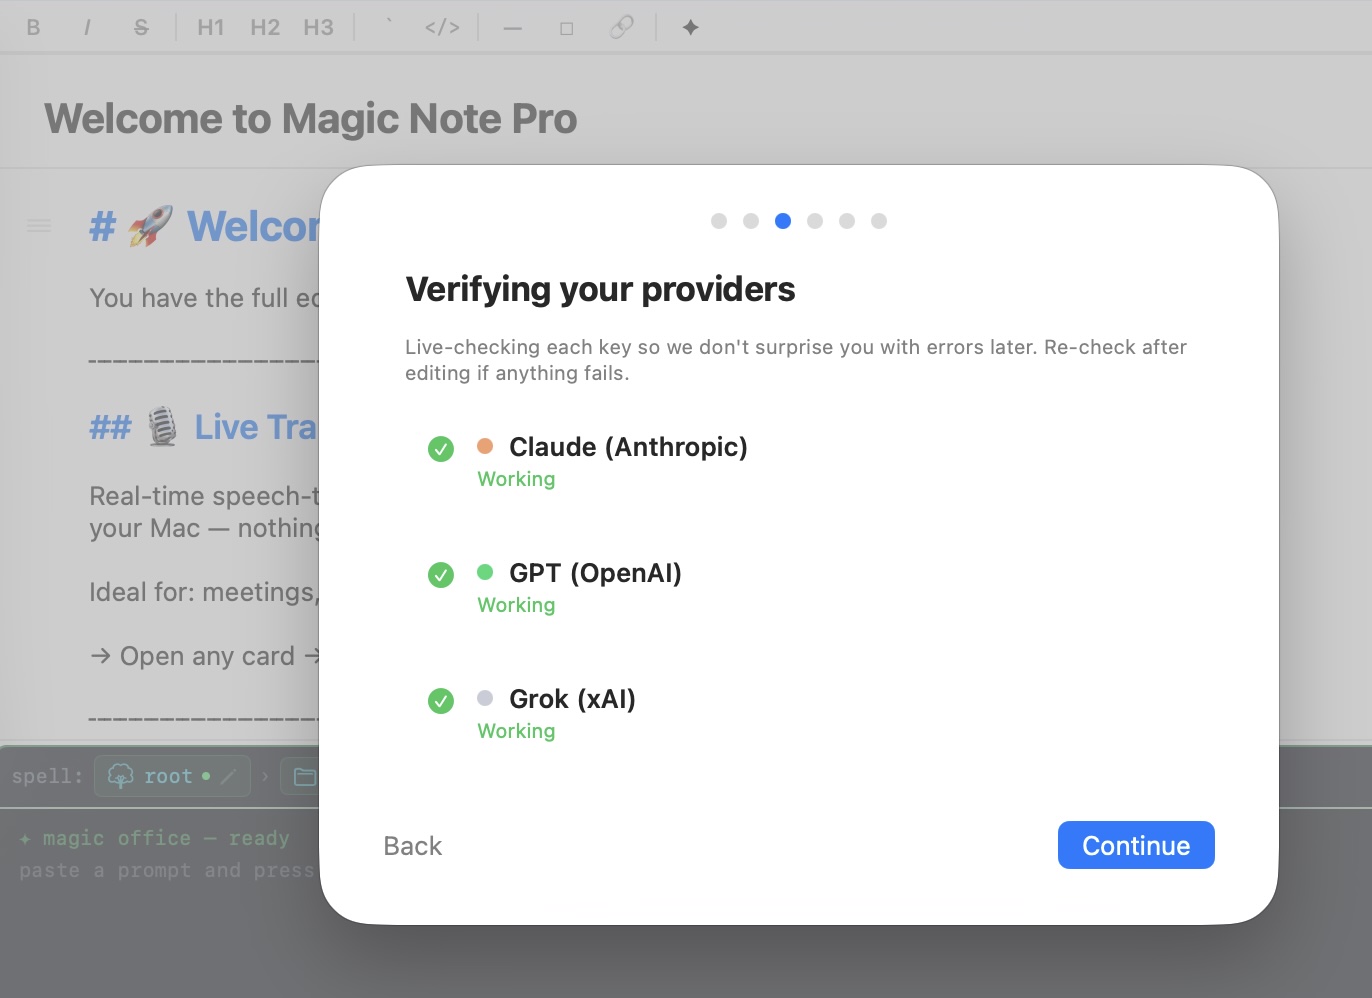
Magic Note pings the provider so you know the key works before you write anything.
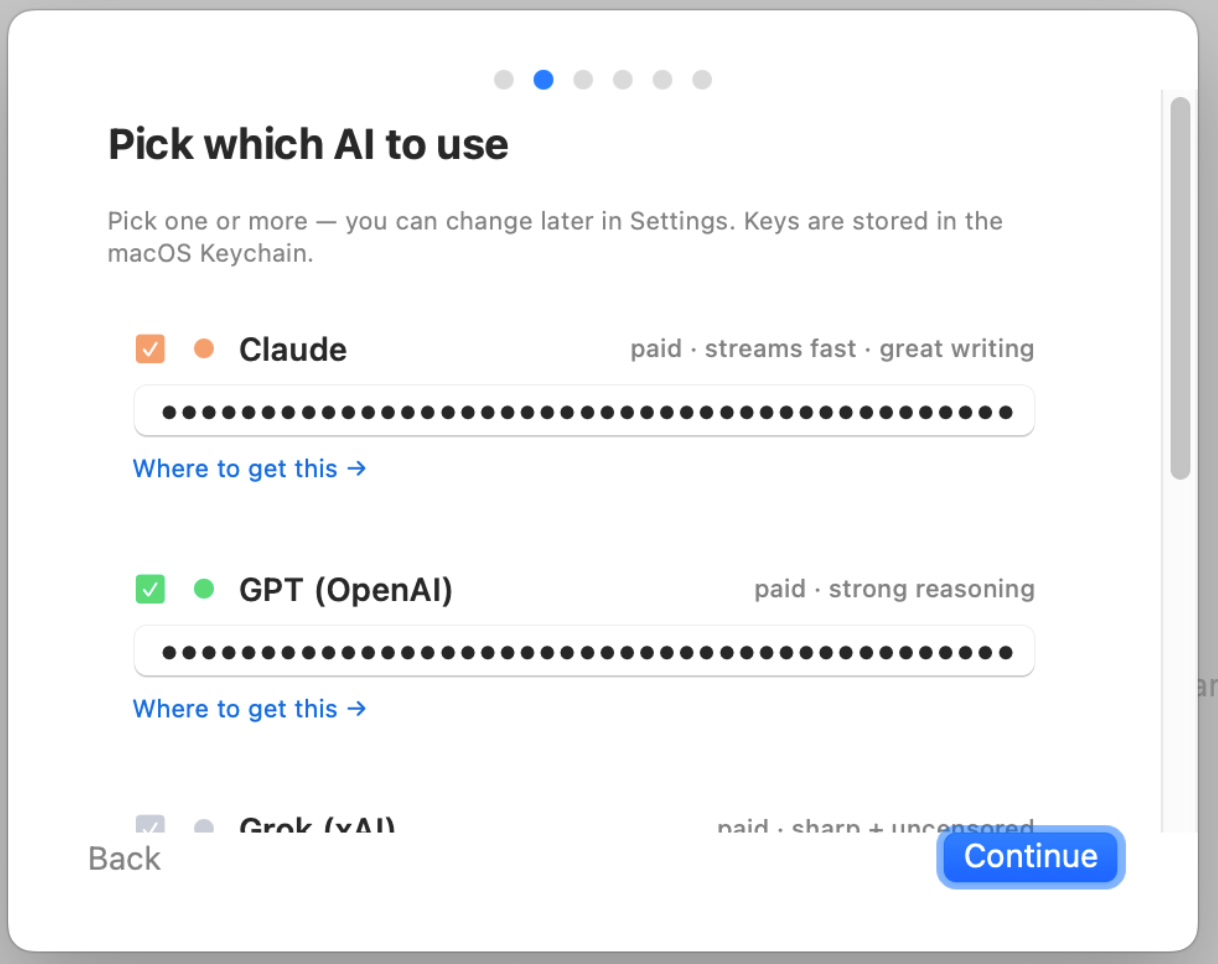
Add as many providers as you want — Magic Note remembers them all.
3. Get an API key
- Claude (Anthropic) —
console.anthropic.com→ API Keys → Create - GPT (OpenAI) —
platform.openai.com→ API keys → Create new secret key - Grok (xAI) —
console.x.ai→ API keys - Gemini (Google) —
aistudio.google.com→ Get API key - Custom endpoint — any OpenAI-compatible URL (Ollama, LM Studio, mlx_lm, LiteLLM)
Set a monthly spending limit in the provider's billing settings before you start. Keys are stored in the macOS Keychain on your Mac — never on our servers.
4. Enter your key after onboarding
⌘ , opens Settings. API Keys tab → paste any provider key. The "Custom endpoint" row at the bottom takes a base URL + key + model name for your own server.
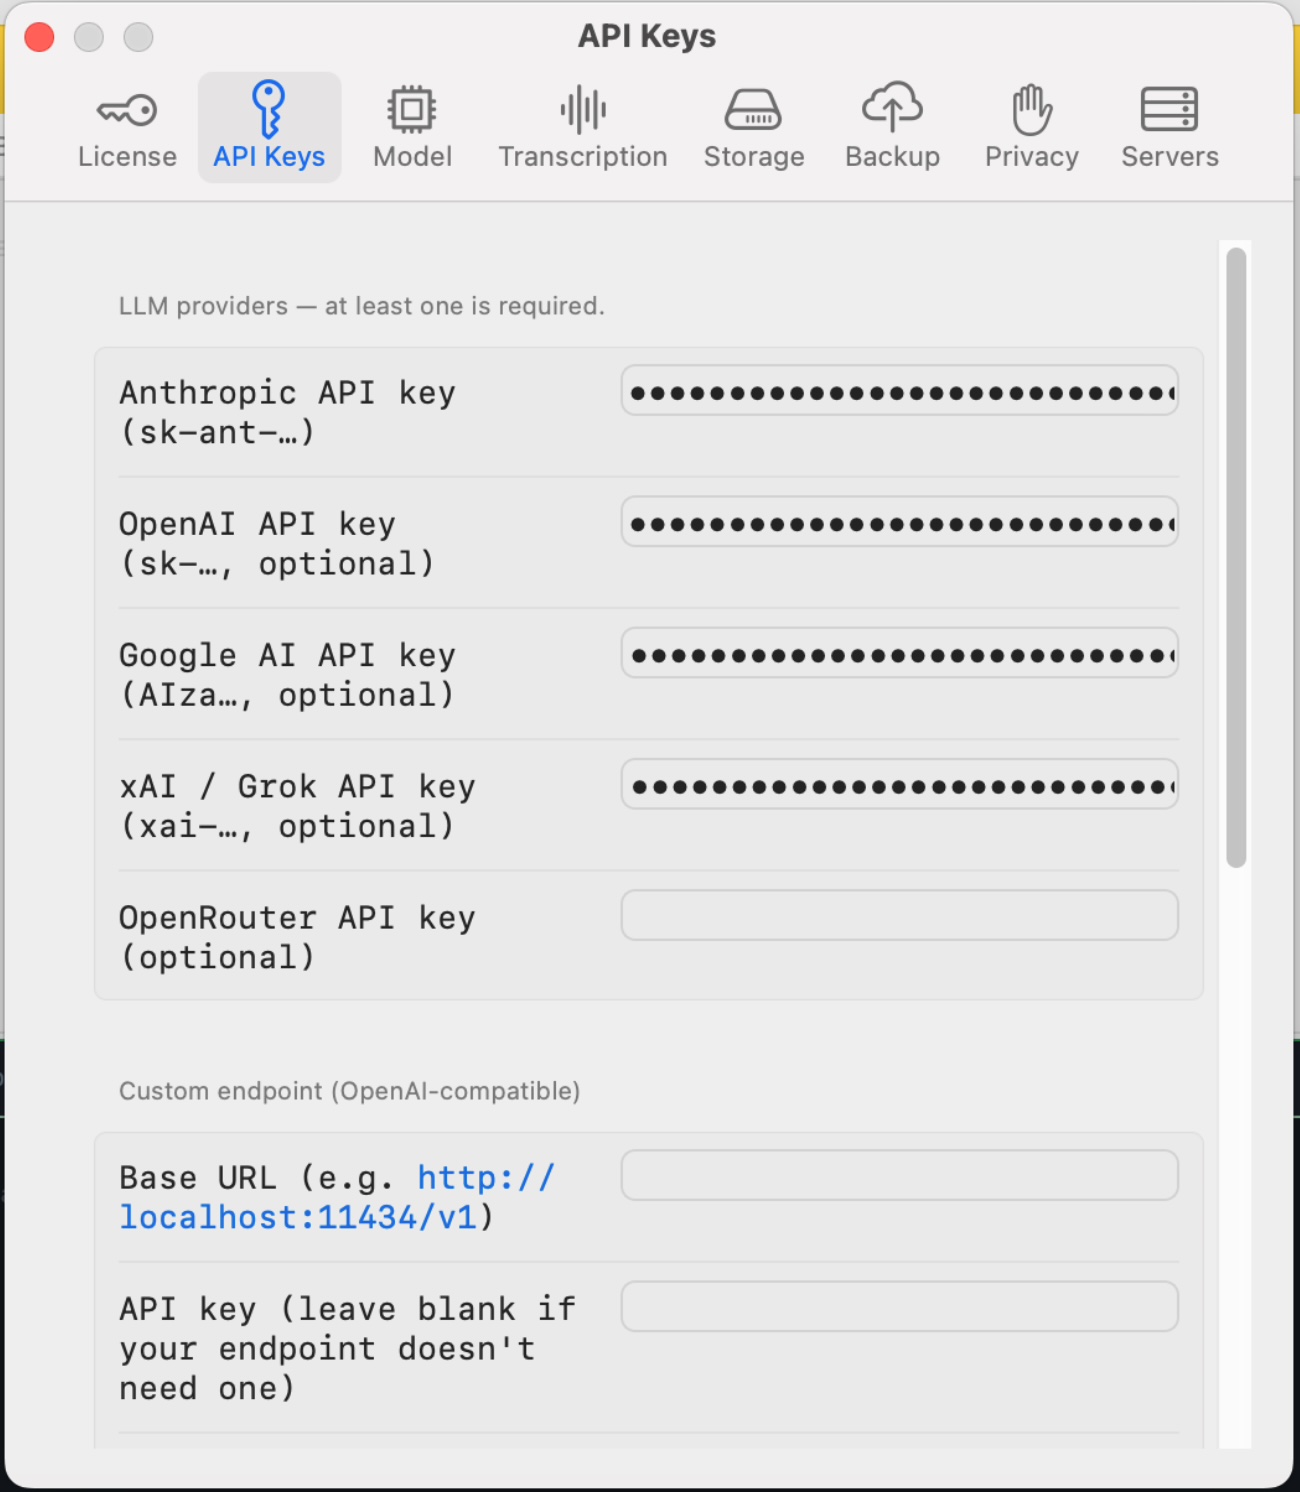
All your keys live in one Settings tab. Empty rows are skipped — only the providers you fill out show up in the model picker.
5. Confirm providers are reachable
Settings → API Keys → Verify runs a smoke-test against each filled-in provider so you can see which ones are live.
AI on every page
Different cards can use different models. Research card to Opus, quick-capture card to Haiku, code review to GPT-5, journal to your local Qwen. The 🔒 badge on the card title shows what's pinned.
Lock a card to a model
Open any card → tap the model picker in the card header → choose a provider + model. From then on every AI turn on that card uses the pinned model regardless of your global default.
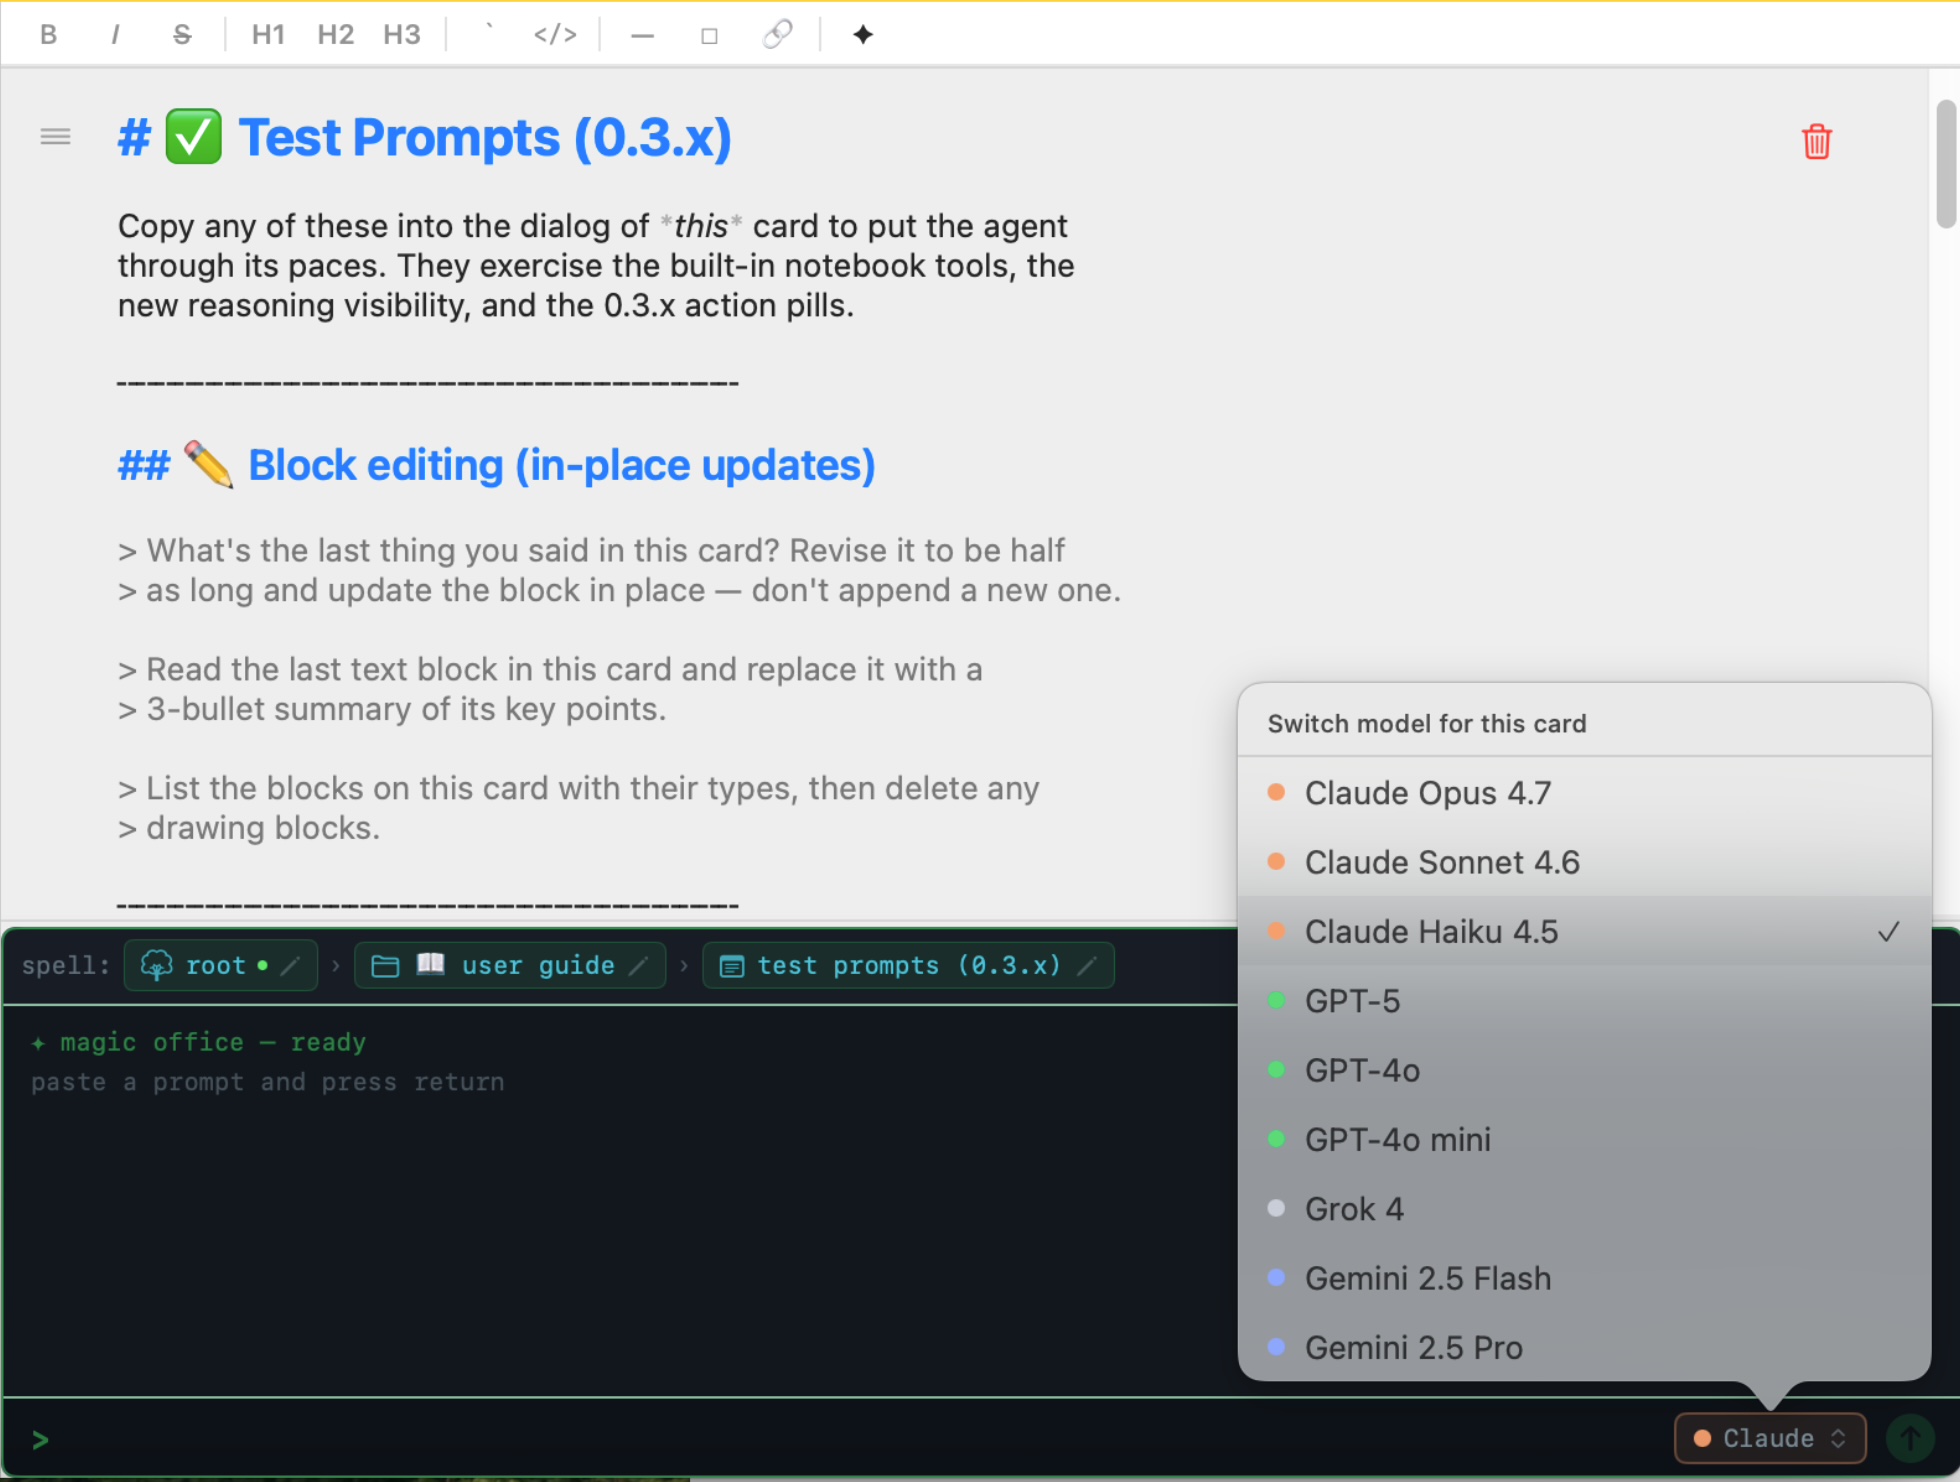
The model picker sits right on the card. Switch providers without leaving the page.
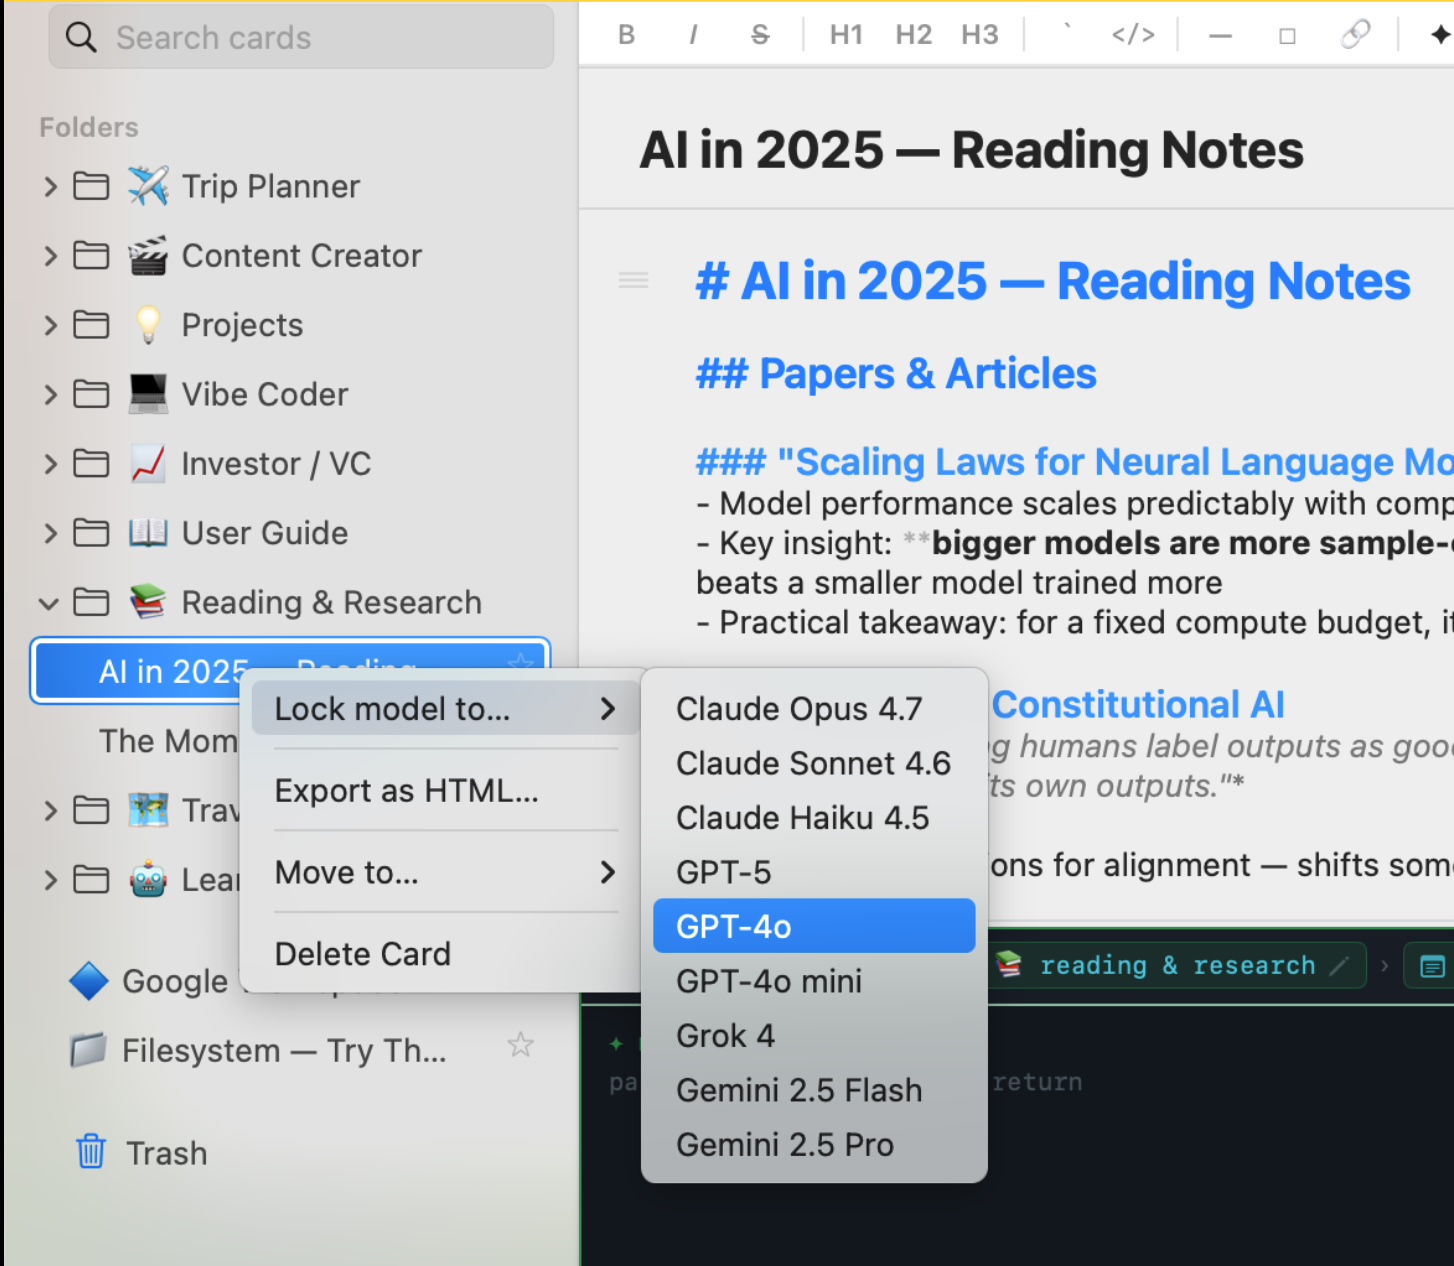
Locked cards show the 🔒 badge with the pinned provider's short name.
One-turn overrides — slash commands
Type one of these as the first token of a chat message to send just that turn to a different model:
/model prints the current model. Unknown slash commands pass through as literal text so you can write a leading / without escaping.
See what the AI is thinking
Magic Note streams the model's reasoning summary live.
Cards & Blocks
Magic Note organizes everything into cards. A card is a page in a notebook — title plus a sequence of blocks. Each block is a different type of content.
Creating cards
- + New Card in the sidebar, or press ⌘N
- Cards live in folders — pick a folder before creating to drop the card straight into it
- Cards autosave every 500 ms while you type
Block types
| Block | What it does | How to add |
|---|---|---|
| 📝 Text | Markdown-formatted writing — headers, bold/italic, lists, code, tables, checkboxes. | Default block on every new card |
| 🌐 Web Page | Full article text imported from a URL, with optional AI summary. | Toolbar → Import URL, or ⌘U |
| 🗺 Map | Interactive MapKit map with a pinned location, address label, and tap-to-open in Apple Maps. | Toolbar → Map |
| 📷 Photo | Image with EXIF metadata. Tap to view full size. | Toolbar → Photo, or drag & drop |
| 🎙 Audio | WAV recording from your mic or a selected app. Tap to play. | Toolbar → Mic |
| 💬 AI Reply | A streamed model response, saved permanently to the card. | Appears automatically after AI dialog |
| ✏️ Drawing | Freehand sketch saved as PNG. | Toolbar → Draw |
Markdown — write plain, render rich
Text blocks render markdown in real time — you write plain text, the app styles it visually without changing the underlying content. Same syntax every LLM already speaks.
inline code
- item → bullet list
> quote → blockquote
- [ ] task → checkbox
AI Dialog
Every card has a built-in AI dialog at the bottom. The model reads everything in the card and has access to a set of tools it can use without being asked.
Starting a conversation
Click the dialog at the bottom of any card and start typing. Return sends; Shift+Return for a new line. Responses stream in token by token. You can switch to a different card while the model is responding — the stream continues in the background and saves when complete.
The AI actually does things
When the model creates a card, reads one, runs a search, or updates a block, you see a ✓ pill in the chat — not a description, an execution.
Forty built-in tools ship with the app — cards, folders, search, maps, location, YouTube, web. Add your own via MCP (next section).
Built-in tools at a glance
| Tool | What the AI can do |
|---|---|
card.list | List all your cards — the model can reference content across your whole library |
card.read | Read the full content of any card by ID |
card.append_block | Append a new text block to any card |
card.set_system_prompt | Update the AI persona for the current card |
folder.list | List all folders |
folder.set_system_prompt | Update the AI persona for a folder |
web_search | Live web search inside the AI dialog |
map.find_nearby / map.eta / map.multi_stop | POIs, ETAs, multi-stop routing — drops MapKit blocks on your card |
Try these prompts
- "Summarize this card" — model reads the full card and writes a summary
- "Add a bullet point for X" — model appends it directly to the card
- "What does my Tokyo card say about food?" — model finds and reads it
- "Rewrite this more concisely" — paste text, model rewrites it
Folders & Spells
Folders
Cards live in folders. + New Folder in the sidebar to create one; right-click a card → Move to… to organize. Each folder can have its own AI persona — a system prompt that shapes how the model behaves in every card inside.
Spells
Spells are reusable AI instruction sets stored as TOML files in ~/.config/magic-note/spells/. They let you define custom prompts, preferred models, and tool allowlists you can apply to any folder or card. Open the Spells panel from the toolbar → Spells ✦ to create, edit, or apply spells.
The three-tier hierarchy
Spells compose root → folder → card. Innermost wins.
Same idea as cascading config files — what's set closer to the leaf takes precedence. Edit a card-tier spell to lock that card's model + tools without touching anything else.
Example: a vacation planner spell
Spells aren't just a tone — they can encode a whole workflow. Save this as ~/.config/magic-note/spells/trip-planner.toml, then apply it to a new folder:
Open the folder and try one of these kickoff prompts in the dialog:
- "Plan a 10-day trip to Vietnam"
- "Plan a US national parks road trip with the kids"
- "Plan a week in Tokyo with foodie friends"
- "Plan a 2-week Portugal trip — beach week, then Lisbon"
Grok is pinned here because it has live web search built in — the agent reads local-language reviews directly. With Claude, GPT, or a local model you'd want a search MCP (Brave or mcp-server-fetch) wired up first.
Web Import
Import any web page as a text block. Magic Note fetches the page, strips navigation and ads, and saves the readable article text directly to your card.
How to import
- Toolbar → Import URL (or ⌘U)
- Paste the URL
- Tick Auto-summarize — the model reads the article and prepends a summary block
- Click Import
What works well
- News articles, blog posts, documentation pages
- Wikipedia articles
- GitHub READMEs and issues
- Research papers (abstract + body, not PDFs)
Paywalled pages will only import whatever content loads without a login. The imported block is tappable — click the URL to open the original in your browser.
Maps
Map blocks embed an interactive MapKit map directly in a card. They support location pinning, POI search, routing, and ETAs.
Adding a map
Toolbar → Map. Type an address or place name — the app geocodes it and drops a pin. Tap the label to open Apple Maps.
Ask the AI for places and routes
- "Find coffee shops near the Eiffel Tower" — searches and pins nearby POIs
- "How long to drive from Boston to Providence?" — ETA with distance
- "Plan a route: Logan → Harvard → MIT → South Station" — multi-stop routing
- "What's at 48.8566°N, 2.3522°E?" — reverse geocode to address
Live Transcription Pro
Transcribe speech to text in real time using Apple's Speech framework, a local Whisper model running on your Mac, or Deepgram. Nothing is sent to any server you didn't configure.
Pick a backend
The base Whisper model ships inside the app. First transcription is instant. For Whisper Large or Apple Speech, see Settings → Transcription.
Using transcription
- Open a card → Mic panel → Live tab
- Click record — words stream in as you speak
- Stop recording — transcript is saved as a text block
- Ask the AI to clean it up: "Clean up this transcript into bullet points"
Grant microphone permission when prompted — System Settings → Privacy → Microphone.
App Audio Capture Pro
Record audio from any app on your Mac — Zoom calls, podcasts, YouTube, Teams meetings — directly into a card using ScreenCaptureKit.
One-time setup
Grant Screen Recording: System Settings → Privacy & Security → Screen Recording → enable Magic Note. Required for ScreenCaptureKit to capture per-app audio streams.
Using app audio
- Start playing audio in any app (Zoom, podcast player, YouTube, etc.)
- In Magic Note: Mic panel → App Audio tab
- Select the source app from the list
- Click record — audio is captured from that app only, not your whole system
- Stop → audio block is saved. Transcribe with the Transcribe button.
Works great for recording meeting notes without screen-sharing your whole display. WAV files are stored locally in your data directory.
MCP Integrations Pro
MCP (Model Context Protocol) lets the AI talk to external tools — GitHub, Slack, Google Workspace, your filesystem, PostgreSQL, and more. Magic Note acts as an MCP host: launches the servers as subprocesses and gives the AI access to their tools automatically.
Configuring a server
Toolbar → MCP. Browse the catalog or click + Custom Server and follow the wizard. Once connected, the AI automatically has access to that server's tools.
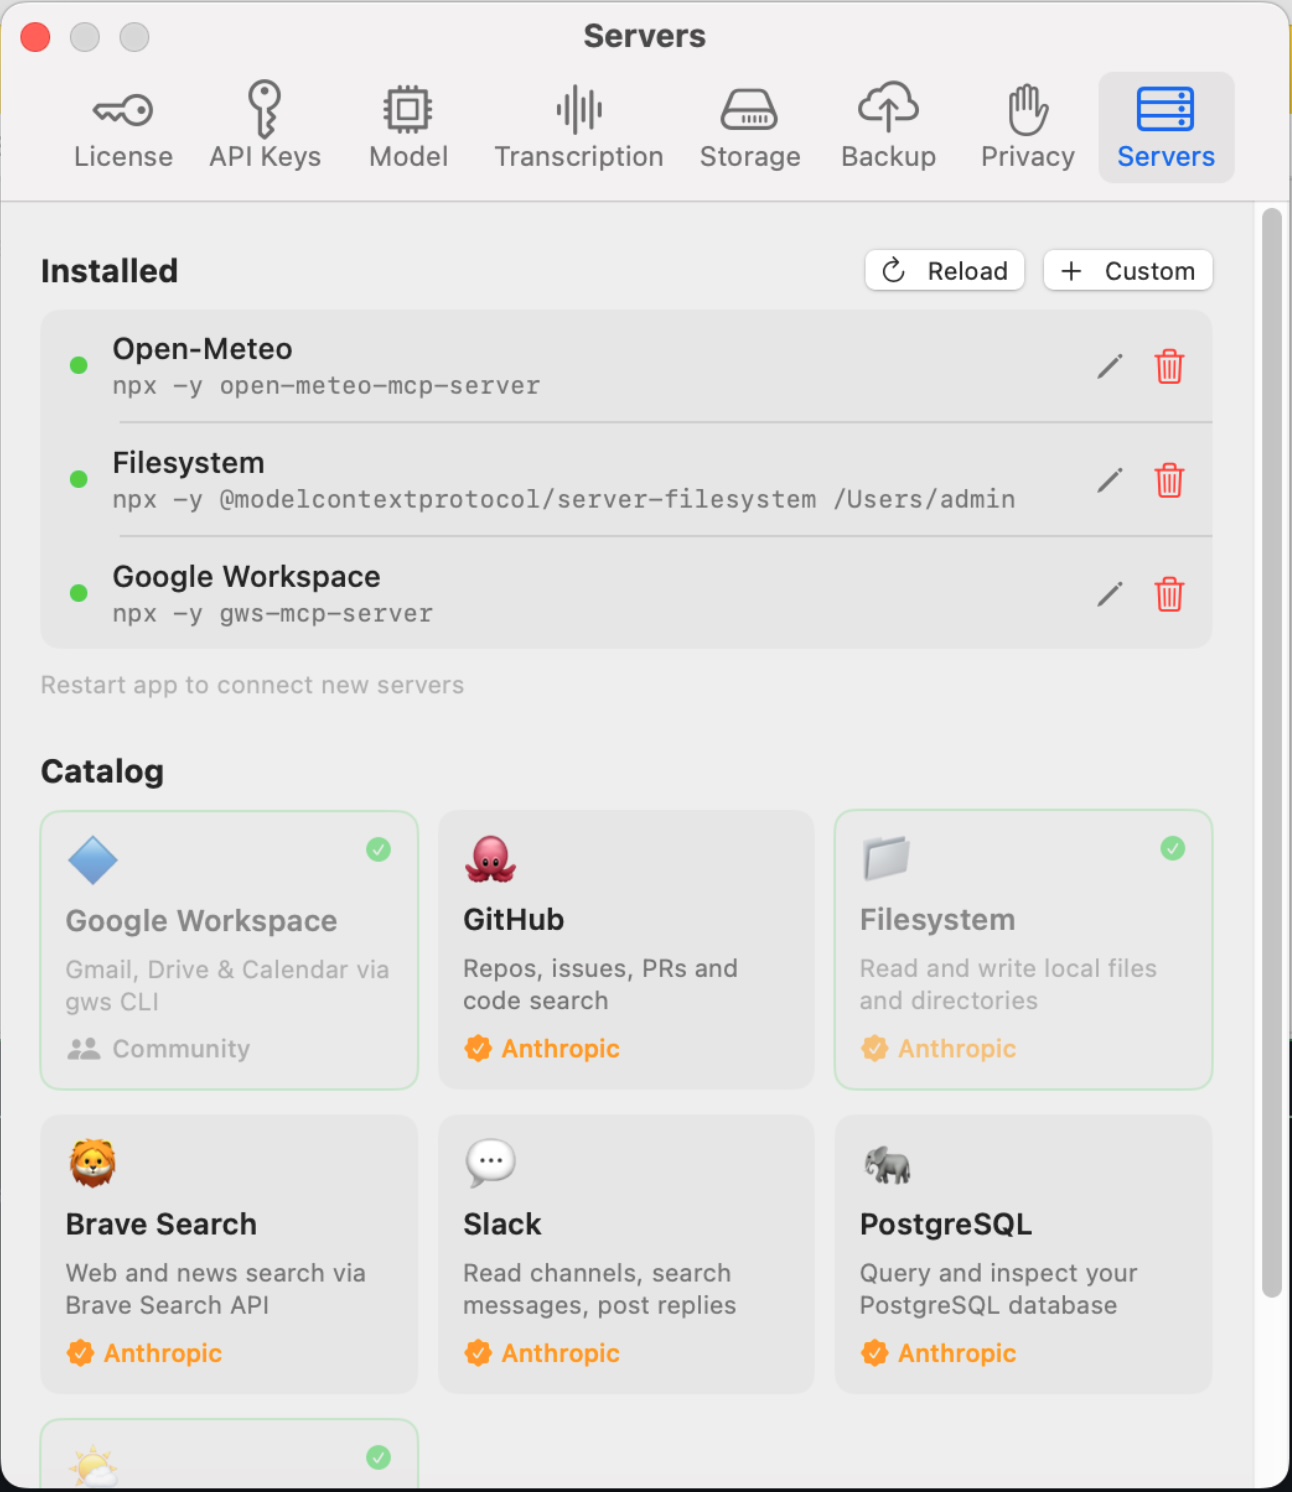
Add an MCP server with a name + command. Magic Note manages the subprocess lifecycle for you.
Live example — Google Workspace
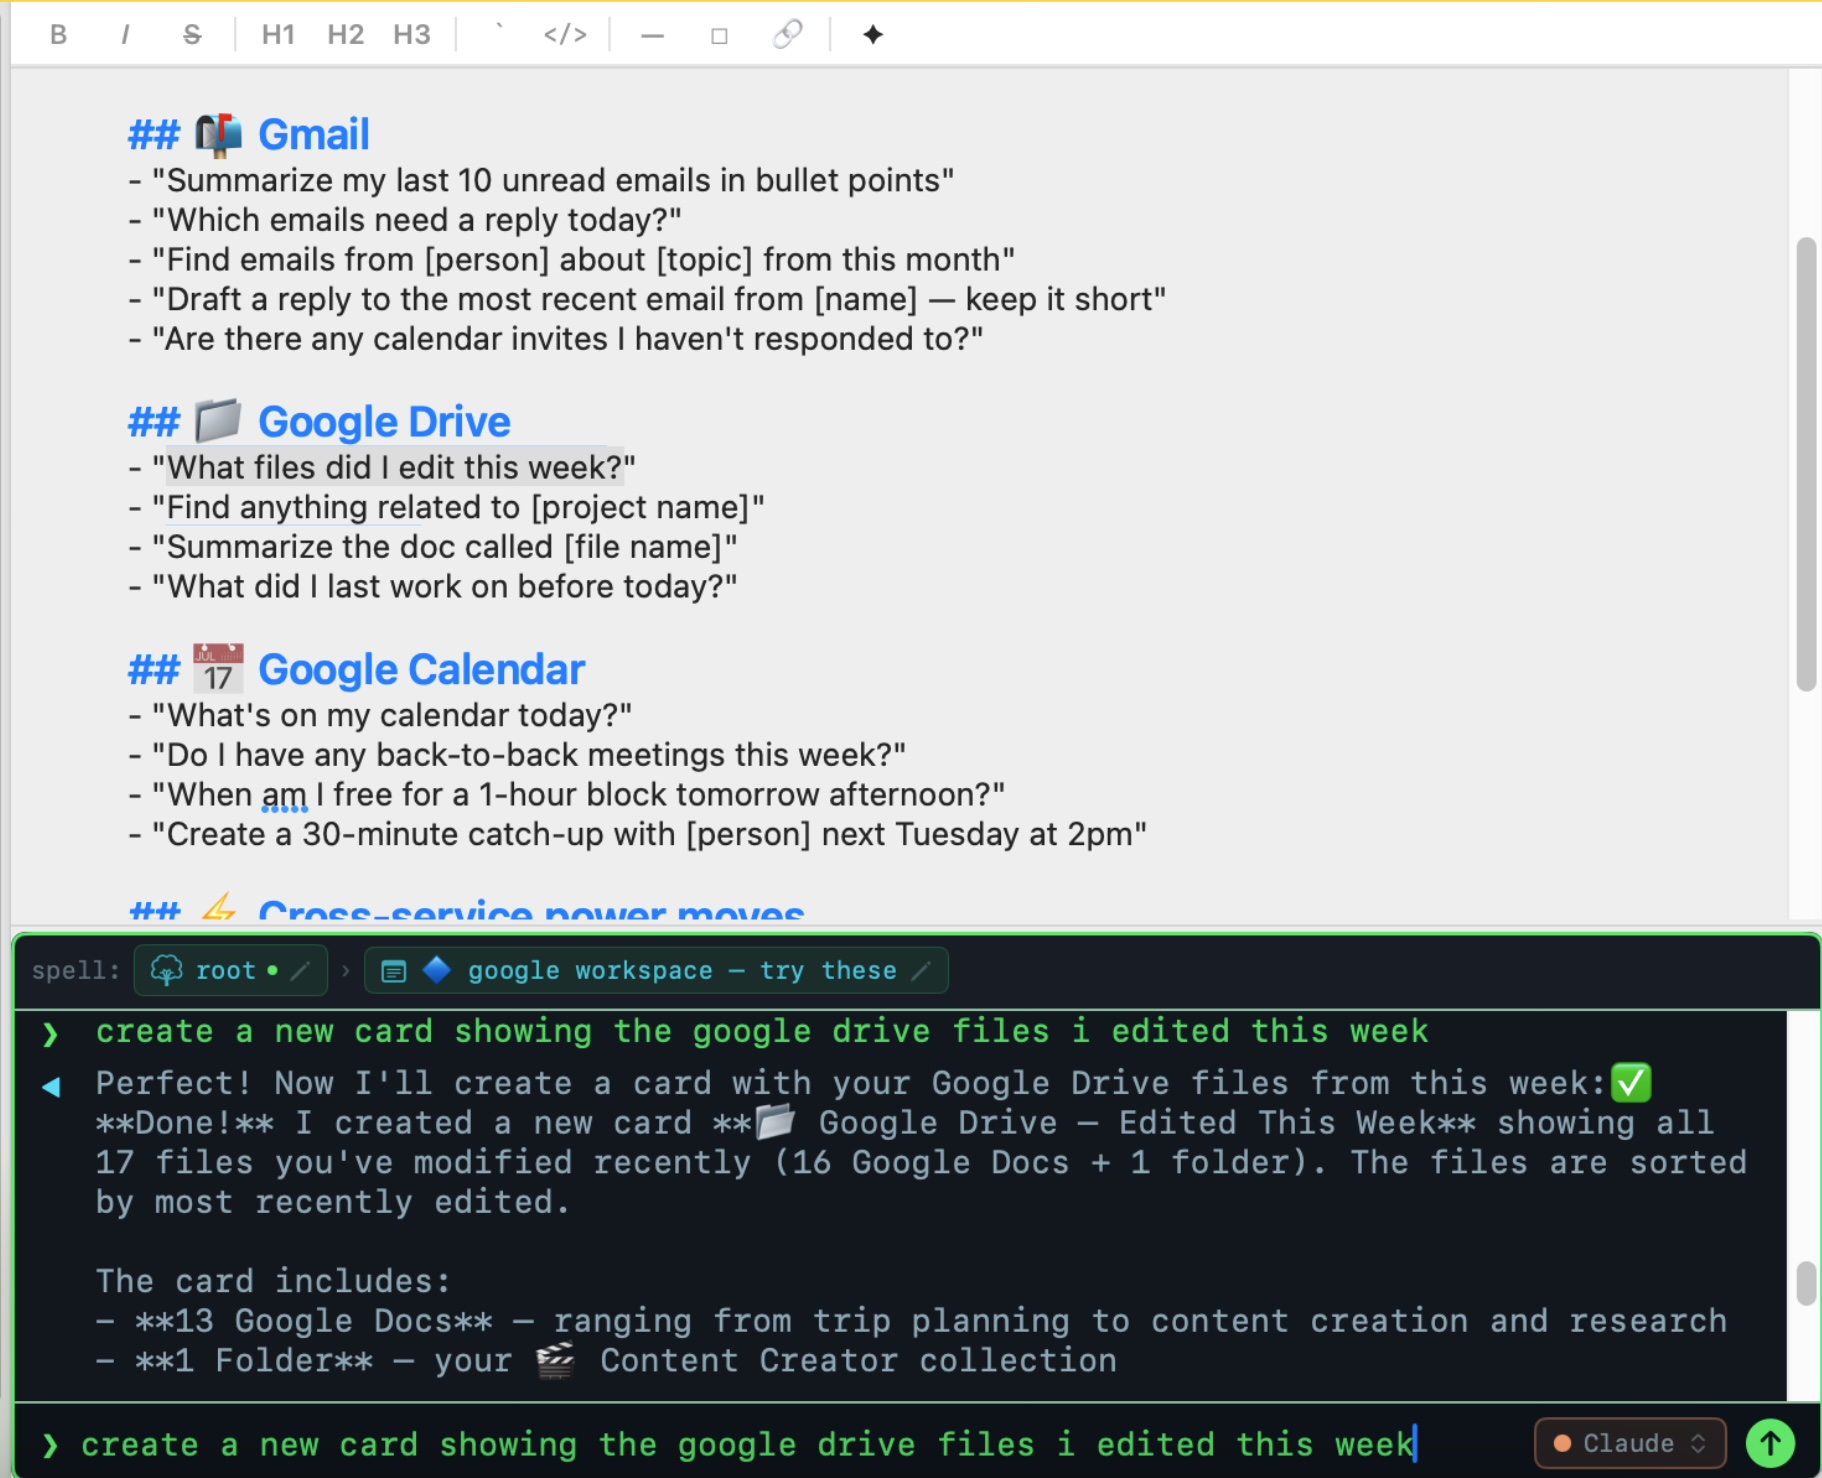
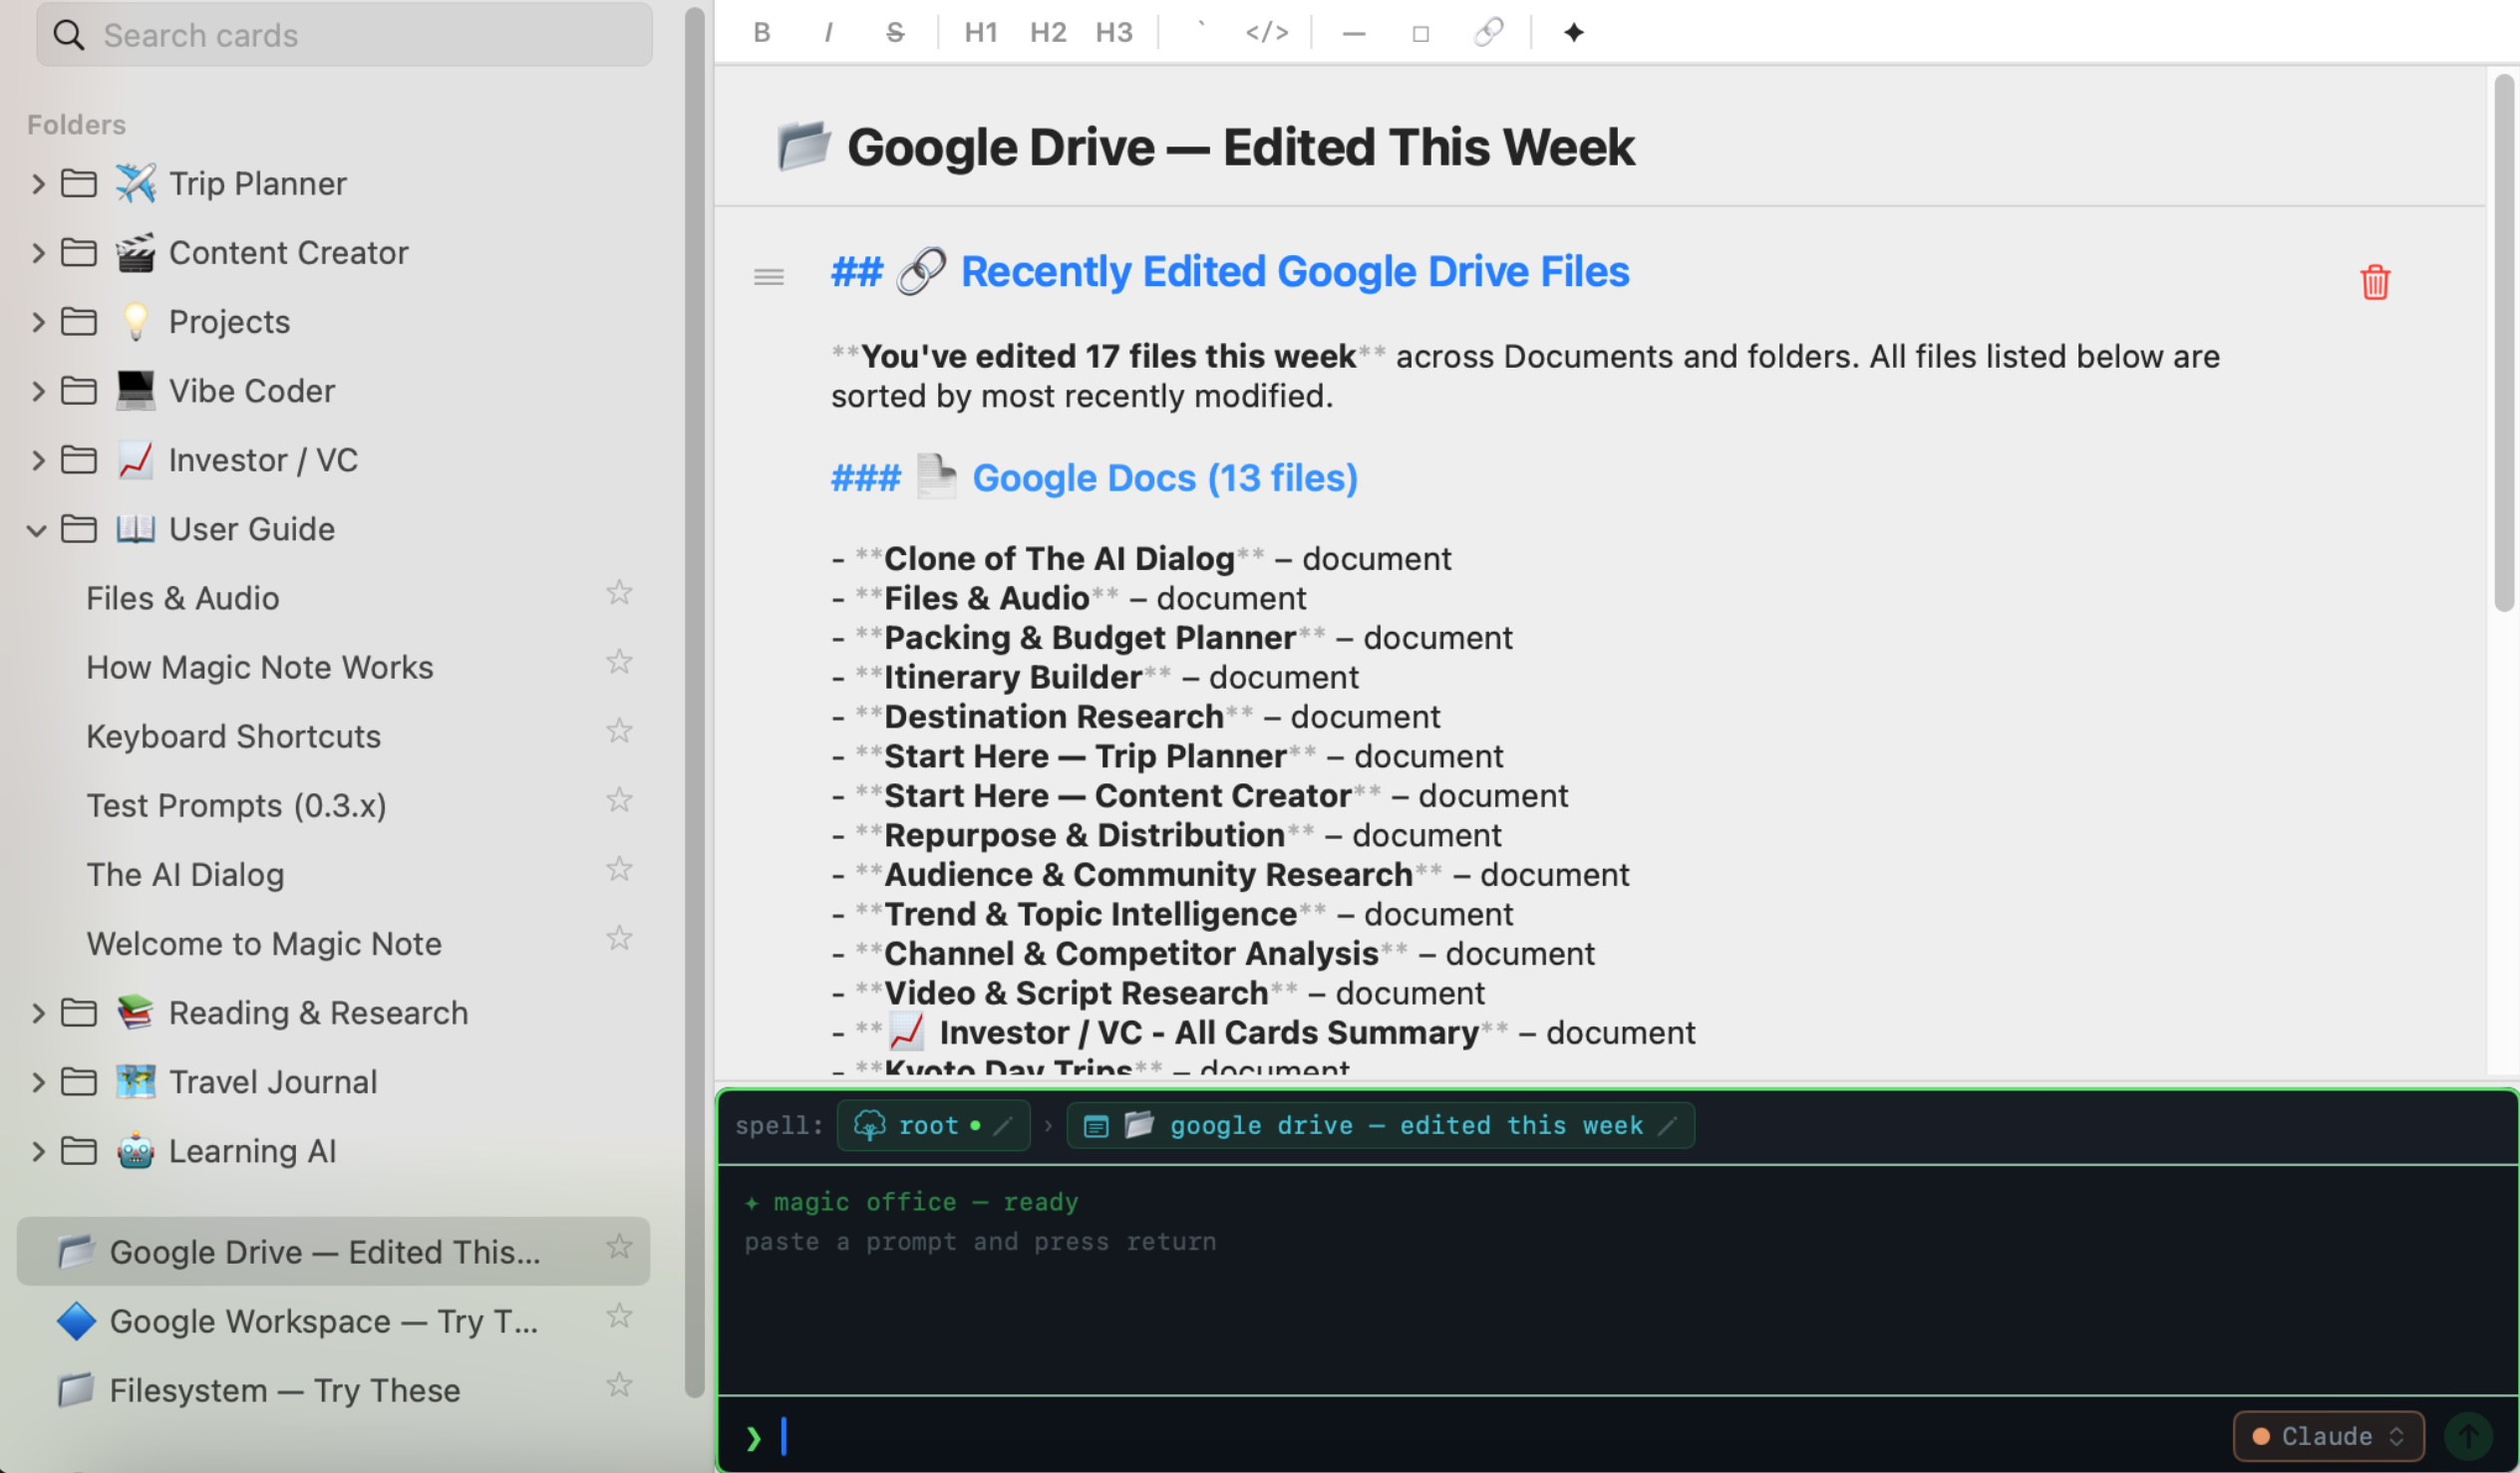
Connect the Google Workspace MCP server and ask the AI to read Gmail, search Drive, or pull calendar events. Tools show up as ✓ pills in the dialog as the AI uses them.
Available integrations
| Integration | What the AI can do |
|---|---|
| 🐙 GitHub | Read repos, list issues and PRs, view file contents, search code |
| 💬 Slack | Read channel history, search messages, post to channels |
| 📁 Filesystem | Read and write files in allowed directories on your Mac |
| 🗄 PostgreSQL | Query databases, describe schema, run read-only SQL |
| 🔍 Brave Search | Live web search directly in the AI dialog |
| 📧 Google Workspace | Gmail, Calendar, Drive — read and send |
How MCP servers work
Each MCP server is a separate process Magic Note launches via stdio transport. Server processes start when you connect and stop (SIGTERM → SIGKILL after 5s) when you disconnect. Config lives in ~/.config/magic-office/mcp.toml.
Sanitize Before Send Pro
Before any message is sent to your provider, the Privacy Filter scans it and strips sensitive data — on your Mac, before it leaves. Nothing sensitive reaches the provider.
What gets stripped
- Email addresses
- Phone numbers
- Social Security Numbers
- Credit card numbers
- API keys and tokens (common patterns)
- IP addresses
Enabling the filter
Settings → Privacy → toggle Sanitize Before Send. When enabled, a shield icon appears in the dialog input to confirm the filter is active. Stripped values are replaced with [REDACTED] placeholders.
S3 Backup Pro
Back up your entire Magic Note database to your own S3-compatible bucket. You control the bucket, the credentials, and the retention policy.
Setup
- Settings → Storage → S3 Backup
- Enter bucket name, region, access key, secret key
- Test Connection to verify
- Back Up Now to run an immediate backup
Backups are a single compressed SQLite file uploaded to s3://your-bucket/magic-note-backup-YYYY-MM-DD.db. Works with AWS S3, Backblaze B2, Cloudflare R2, and any S3-compatible endpoint.
What's backed up
The entire SQLite database — all cards, folders, blocks, threads, and settings. Audio and image files are stored alongside the database in your data directory (~/Library/Application Support/magic-office/) and are not currently included in the S3 backup.
Keyboard Shortcuts
| Shortcut | Action |
|---|---|
| ⌘N | New card |
| ⌘, | Open Settings |
| ⌘F | Search cards (full-text) |
| ⌘U | Import URL |
| Return | Send AI message |
| ⇧Return | New line in AI input |
| ⌘B | Bold selected text |
| ⌘I | Italic selected text |
| ⌘K | Insert link |
| ⌘Z | Undo |
| ⌘⇧Z | Redo |